
A product has been added to the basket
A Beginner's Guide to Calligraphy
A Beginner's Guide to Calligraphy
 What comes to mind when you think of calligraphy? Perhaps you picture a medieval monk hunched over parchment, working hard by candlelight to produce scripture. Maybe you think of Confusian scholars in imperial China working with brushes and stone steles. Or possibly you think of someone in the present day, carefully crafting the lettering on the envelope of a wedding invitation.
Though much has changed over the years, practicing calligraphy can make you feel beautifully connected to the past - to times when writing things down was necessarily slower, more considered and meditative. Contemporary writing equipment certainly makes it easier than ever to create beautiful lettering, but much about the art of calligraphy remains the same - it is a time- and labour-intensive practice that can take years to master. Despite this, calligraphy’s resurgence in recent years shows that many of us are up for the challenge. If you think you are too, then read on for our tips and guidance on how to get started.
Patience
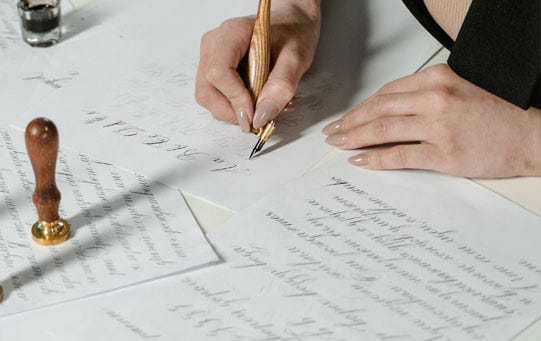
Probably the most important lesson to learn with calligraphy is that you must take your time. Calligraphy is very different to normal handwriting and should be approached with a different mindset. It’s a bit like the difference between a quick sketch and an oil painting - rather than dashing off your words with speed, each stroke is a careful and deliberate decision, requiring maximum focus and attention. You may have the nicest, neatest handwriting in the world, but this doesn’t automatically make you a great calligrapher; likewise, just because your normal handwriting is a little scruffy and untidy doesn’t mean you won’t be able to produce beautiful lettering. What will improve the quality of your calligraphy - just like with any new skill - is patience and practice.

When handwriting normally - particularly if you write in cursive - you may aim to keep your pen on the paper for as long as possible, usually writing whole words in a single stroke. This is not the case with calligraphy. A single letter can be made up of as many as 5 different pen strokes, and for each stroke you will want to lift your pen and carefully inspect your work before continuing. This will seem daunting at first, but this level of attention to detail is vital when getting started, and will ensure you progress more rapidly. After all, nothing worth having comes easy!
Choose Your Tools
 The modern calligrapher has two main tools in their arsenal to choose from: cartridge pens and dip pens. Cartridge pens are the most common type of modern fountain pen - just load in a disposable cartridge and it will release ink through the nib as you write. These pens are simple to use, clean and convenient. Alternatively you may prefer a more traditional dip pen, where ink is loaded into the pen’s reservoir by dipping the nib directly into a pot of ink. These pens are a little messier and have a steeper learning curve than the alternatives, but grant you access to a much wider range of nibs and inks, allowing for more experimentation and variety. It’s also important to note that the inks used for dip pens tend to be a bit thicker - if you attempt to load these inks into a cartridge pen you run the risk of blocking it completely, so make sure you’re using the right ink with the right pen.
Different Strokes
A key feature of calligraphy which makes it different to normal handwriting is the variance in line thickness. While most ballpoint, rollerball and fountain pens will deliver fairly uniform line thickness, the beautiful scripts that calligraphy pens produce are achieved by varying the breadth of your pen strokes.
In general, when moving the pen towards you - downstrokes - you'll want to produce thicker lines, while moving it away from you - upstrokes - produce thinner lines. Learning to control these different strokes is one of the biggest challenges that calligraphers face, and one of the reasons that each pen stroke requires so much care and patience.
Know Your Nibs
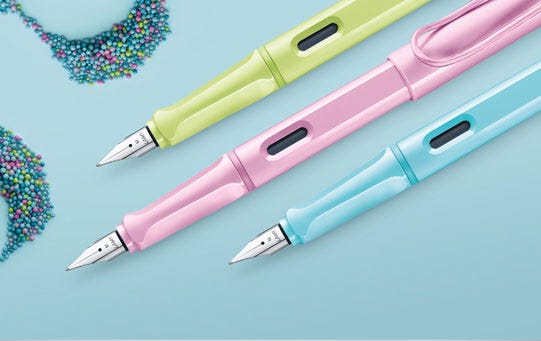
 Those unfamiliar with calligraphy pens are likely unaware of the sheer number of different nib types that are available. For starters, the tips of calligraphy nibs tend to be a little wider than those of normal fountain pens. The thicker the nib, the greater variance in line thickness you will be able to achieve - though do note that while thicker nibs may look the prettiest, they tend to be harder to get consistent results with.
For even more control over line thickness you may want to try a flex nib. Rather than you having to work with different angles, these nibs use pressure to achieve different line thickness - lean harder on the page to release more ink and produce a thicker line, then ease off again to get something a little thinner. It takes a bit of getting used to, but flex nibs are able to produce truly stunning lettering once you get the hang of it.
What’s Your Angle?
With each new pen or nib you will have to experiment to get it working at its best. Make sure you are gripping the pen in a comfortable manner, close enough to the nib to give you good control but not so close that you smudge your work or can’t see what you’re doing. Always check in on your body and notice any points of tension, particularly as you may find yourself gripping the pen far too tight - remind yourself to relax and loosen up, even when your work demands close attention.
The angle of your pen is also crucial. There is no single right answer - it will depend on the nib you are using, and the specific script you are seeking to replicate. Start at around a 45 degree angle and see how you get on, then make adjustments from there.

Practice Makes Perfect
Calligraphy can take many years to master, but the work you produce is its own reward. Know too that while you will always be learning and improving, with the right tools and a bit of patience it won’t take you long before you are surprising yourself with the quality of your lettering. Thankfully there is also an abundance of useful resources available online, from samples of different scripts to print-out drills and templates for you to practice with. Just remember to take your time, take pride in your achievements and progress, and make sure above all else that you’re having fun!

Rollerball vs. Ballpoint Pens: A comparison July 17, 2013

Refill Guide September 2, 2015


Fountain Pen Nib Width Comparison August 4, 2015

Lead Sizes for Mechanical Pencils October 19, 2015
Cutting Edge - Unconventional Pen Materials April 18, 2024
Egg-straordinary Stationery March 21, 2024
LAMY safari's Spring Awakening April 26, 2023

Flair for Fashion March 8, 2023
Comments